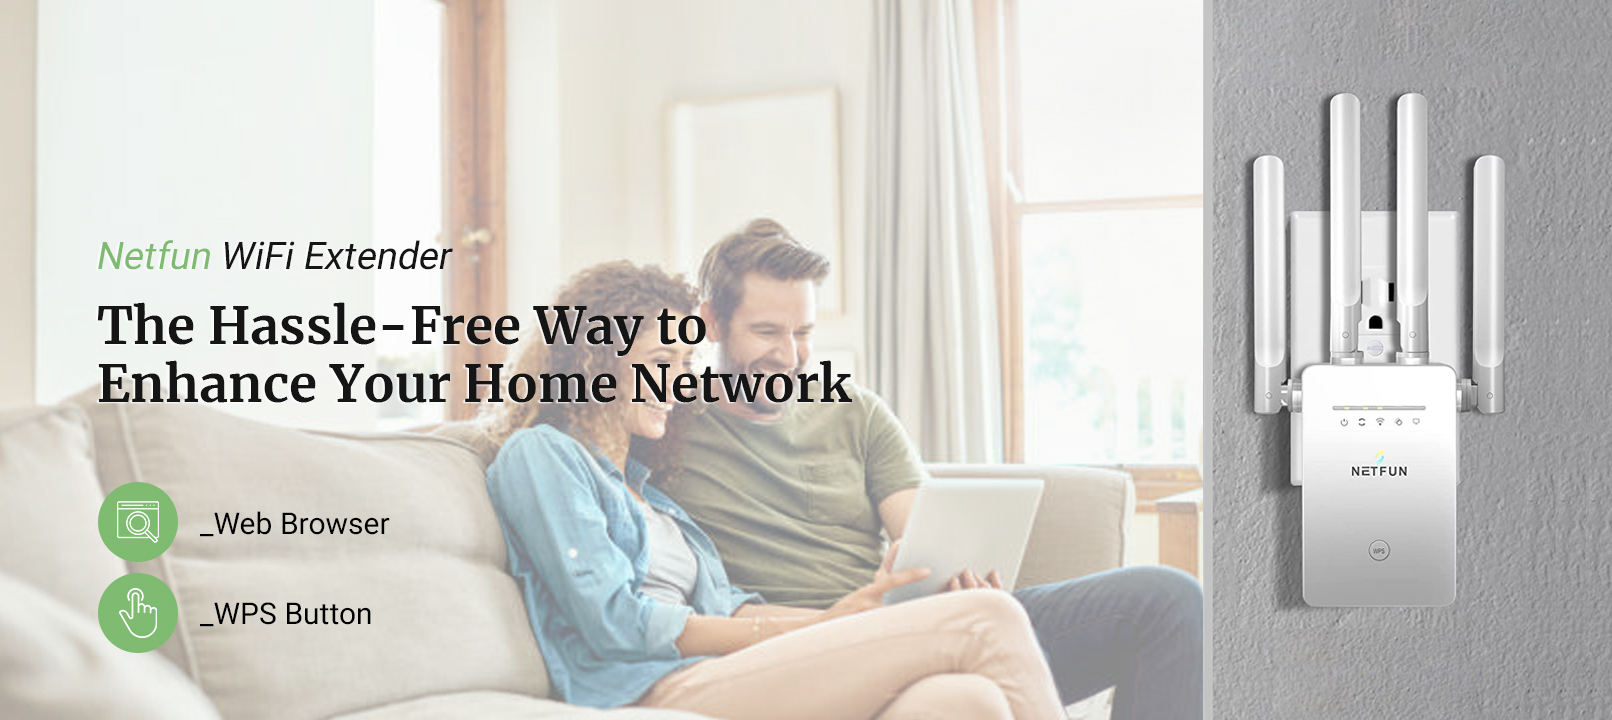
Enhance your existing network’s coverage by proceeding with the Netfun WiFi extender setup. The Netfun extender offers impeccable network range and a high-speed internet connection. All you need to do is set up the extender accurately, and you’re good to go. It’s imperative to set up the extender correctly, as you can only get the best by setting it up. If you fail to set it up properly, it’ll defeat the purpose of having a WiFi extender.
Therefore, you require the correct instructions for the Netfun WiFi extender setup. Today, we’ll discuss the procedure for the Netfun range extender setup. If you want to find out the complete process, keep reading ahead.
Steps for the Netfun WiFi Extender Setup
To set up the Netfun WiFi extender, there are two methods. The first method is through the web browser and the other is via the WPS button. For the web browser method, you require the correct IP address and the default login password of the extender. You can find the login password on the extender only. Whereas, for the WPS method, you just need to ensure your router also supports the WPS button. You can follow the below steps to set up your extender:
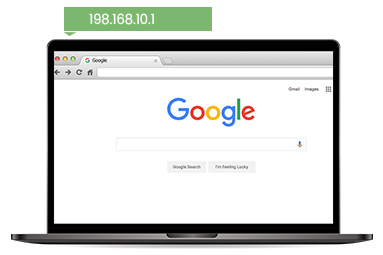
Netfun WiFi Extender Setup Via the Web Browser
To begin with, connect your PC or smartphone to the extender’s network.
You can use an Ethernet cable to form a connection between your PC and the extender.
On that, open a web browser of your choice, such as Chrome, Mozilla Firefox, etc.
Now, enter the IP address in the address bar of the browser.
When the login page appears, select the language and enter the login password.
The admin panel of the WiFi extender will appear on your screen.
Hereon, select the ‘WiFi Repeater’ mode from the given options.
Now, select the ‘Scan AP’ option to search for all the available WiFi networks.
After that, select your router’s SSID and enter the password to form a connection.
Once a connection is made, you can set a name for your extender and set a password.
Finally, you can relocate the WiFi extender and connect your devices to the extender.
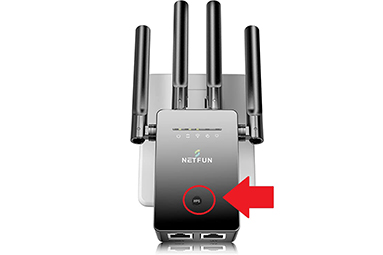
Netfun WiFi Extender Setup Through WPS Button
Primarily, find the WPS button on the router and the extender.
Now, press the WPS button on the router for 2 seconds.
Within 2 minutes, press the WPS button on the extender for 2 seconds.
When the connection is successful, the WiFi LED on the extender will light up green.
After that, the extender’s and your router’s SSID and password will be the same.
At last, you can connect your devices to the extender’s network and relocate it.
These are the steps for the Netfun WiFi extender setup. Just remember to place the extender halfway between the router and the dead zones. If you place it too far from the router, the connection will break and it’ll stop working. If there’s anything you require assistance with, you can get in touch with our team now.